Using AI To Create Checklists
Probably the simplest way to create checklists in an article, is by using the new Artificial Intelligence functions feature. ( new in #v5 ).
This AI function lets you describe the type of checklist you want to add, and it will automatically create the steps of the checklist for you. It can even add forms to the checklist items, and configure workflow to send each step to the appropriate department.
Please read important information about using the AI functions before using it.
To access the AI function, first edit an article. Then, in the editor, click the lightbulb icon, highlighted below: 
This will bring up the AI Functions window, where you select the function to use. 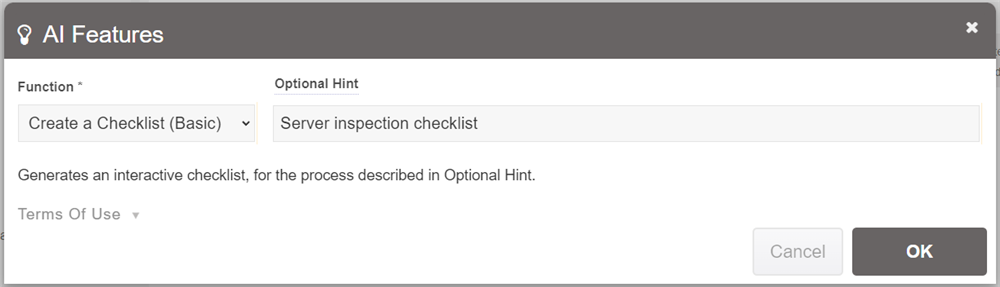
In the case of checklists there are three options you can choose:
- Create a Checklist (Basic)
This option just creates a basic checklist, without any forms. The user will just run through the checklist entries by themselves, with the option of entering in notes as they go. - Create a Checklist (Forms)
This options adds in a suggested form for each checklist entry. This can be edited after the fact by hovering the cursor over the entry and clicking "Form Editor". There you can edit the fields, remove them or add missing fields to the form. - Create a Checklist (Forms+Workflow)
This option goes one step further, adding in both suggested forms but also putting in assignments to each entry. It will look at the type of actions taken for that step, and decide which out of the user groups you have pre-defined it should be sent to. It's important to make sure you define all your User Groups for each department before you do this.
When adding forms, the AI will do its best to come up with a list of fields it thinks would typically be collected from the user for that type of checklist. Of course, the AI is limited in what it is trained on and may not understand your specific requirements. This is why it's important to edit the information once it is generated, to ensure the fields are appropriate for the specific checklist you requested.
For workflow, it will set the assignment for each stage to be a particular user group you have defined. As it only knows about the user groups you have defined, it will just select out of those if they are appropriate. You can also edit the assignments for each stage by hovering over the checklist entry and clicking "Form Editor". The assignment selection is shown at the top, in terms of a group. You can remove it by clicking the dropdown and clicking "reset", or instead choose a user to assign the checklist entry to.
Example: Creating a purchase order workflow
Let's go through what's involved in creating a purchase order workflow using the AI.
- Firstly, create a new article called "Purchase Order Procedures".
- Next, click on the light-bulb icon to bring up the AI function.
- Select "Create a Checklist (Forms+Workflow)".
- In the hint box, put "purchase order workflow, from the perspective of the purchaser only".
(Note: you need to specify that it should only be from the purchaser only, otherwise it might create steps that include the supplier's actions).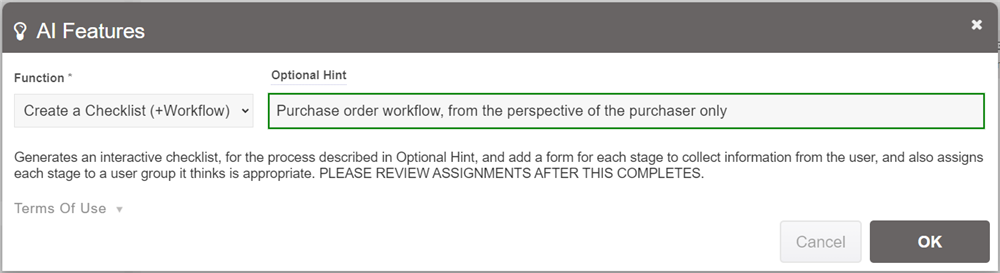
- Once you click OK, it will then send this request to the AI engine, and process the results. This can take a few seconds to complete.
- In some cases, it may show an error telling you that you need to try again. This can be because the AI engine is currently at capacity, or it was unable to parse the response that the engine provided. Usually retrying will fix this.
- Once complete, the AI will insert the resultant checklist directly into your article.
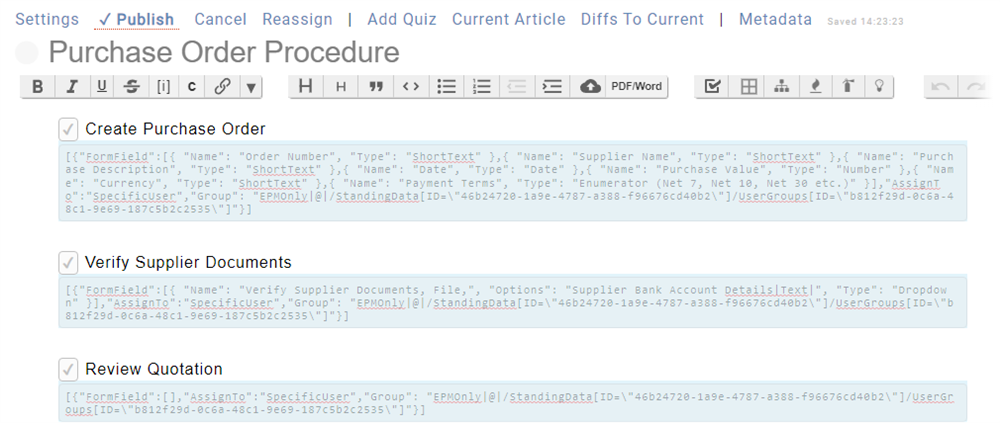
Above is an example of what the AI engine produced. Note that every time you run this request, the answers will be a little different. This is deliberate, as the AI engine includes a certain randomness for creativity.
Once this is published, the checklist will look like this: 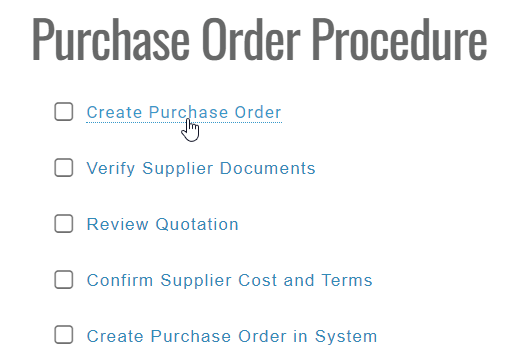
And clicking on the first entry will pop-up the form it suggested, which would look like this: 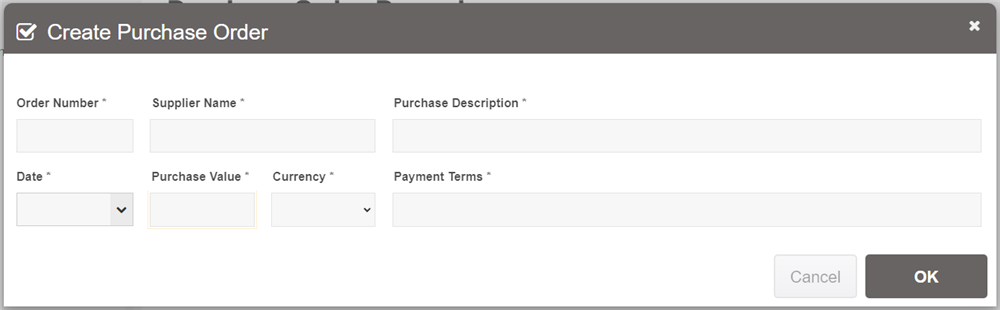
When you create your checklist, try running through it to see how it works before you release it to everyone. You can do this by adding a "Required User Group" to the article of, for instance, "Beta Testing". Then just include people in that user group who will be involved in beta testing new features, such as yourself.