Basics of Customizing
To get started with customizing a form, you must be logged-in as an administrator user. Then go to the Configuration tab and select "Form Customizations" from the options available there.
Now click the "+" button to add a new form customization. You can only have one entry for each type of form you are customizing, so if there is already a form customization entry then select that instead.
In the pop-up form, there should be a dropdown where you can select the form to customize, as we listed in the previous section. Choose a form and click OK. It will then create an entry for you in the Form Customizations list, and will automatically pull in all the existing system fields.
Understanding Fields and Layout
Once you are on the Form Customization entry, you'll see the list of fields which will look something similar to this: 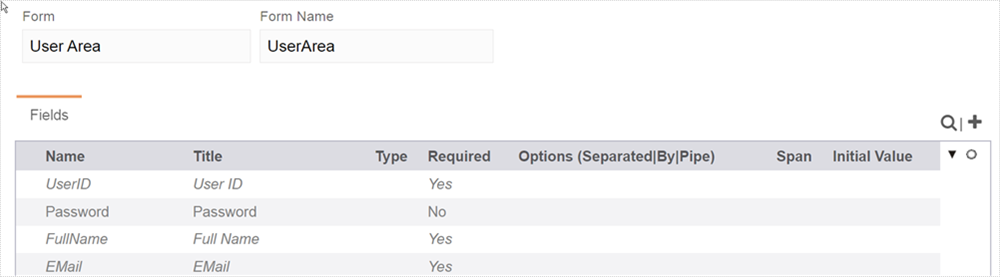
If you feel that the list is out of date (perhaps after upgrading) you can click on Refresh List to update it. However this usually won't be necessary.
It's important to understand how this translates into the form you normally see on the screen. The system will automatically lay out the form according to the fields you see here. Each field becomes an entry box, which fill the form from left to right in 4 columns. Once those columns are filled it will start a new line and go back to the first column to continue.
Our platform uses these field lists to create each form in the system. That means that changes you make to this list of fields will change the way the form is created on the screen. For example you can add new fields or hide existing fields, and that will be reflected in the system form after the changes are applied.