Insert & Update Articles
To view a training video on inserting articles and setting up approvers, please click here.
Insert Article
When you want to add a new page to a wiki, you first have to go to the page relative to where you want to insert the new page. For example if you want to add a new page to the end of a section, you'll go to the last page of that section and then insert the new page there.
Note: If you have the option "Only Wiki Managers Edit" on the Configuration tab, you will need to be logged in as a Wiki Manager before you can insert or otherwise change any articles. Otherwise, for non-Wiki Managers, the edit options will not appear (unless "Request Updates" is enabled for the user).
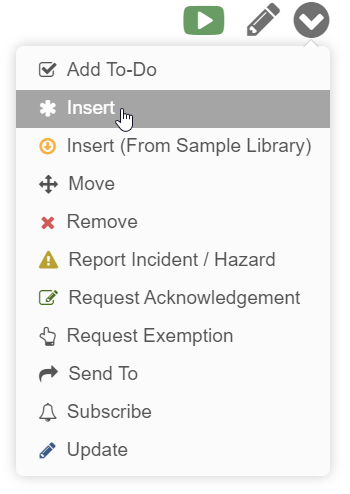
On the selected page, click the down arrow to show the dropdown menu and select Insert (If the parent article is a draft, you can find the action menu in the navigator on the left hand side). 
This will pop-up with a form like this:

The Insert Where setting lets you choose where the new page will be located relative to the page you are on. It defaults to Below Article, but you can also choose Above Article, or As Sub-Article. The Title field is the title of the article that will show up as a heading at the top of the article.
Once you click OK it will immediately take you to the new page, in draft mode. There you can enter in the contents of the article (and change the title), and when you are done click "Publish" at the top.
Note: Newly inserted articles will not be visible to end-users until they are published. However, they can be seen by other Wiki Managers as a placeholder article, and the contents can be viewed in the History link at the bottom of the placeholder. #v5

When entering the content, you will be using the formatting toolbar above the text area. More in-depth details about formatting and the toolbar is found in Article Formatting.
The Settings link can be used to set approvers and any quizzes that are required to view the article.
When you are done, click Publish at the top of the editor. You can optionally enter in an explanation of the changes you made, which will be seen in the history of the article and by any reviewers. Once published, the page will either show straight away, or will have to go through an approval process, depending on how the parent pages are permissioned.
Update
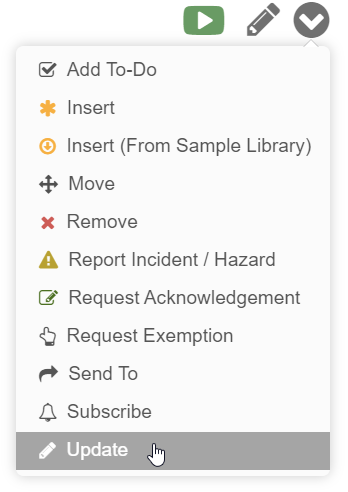
You can edit a page by either going to the action dropdown menu and selecting Update, the Pencil Icon beside the action menu, or by clicking the Modify Page link at the bottom of the page. 
Editing pages is similar to inserting pages, except you will be taken immediately to draft mode, editing the article in-line. You have the same option to set the title and the content, and the Settings link can be used to set approvers and any quizzes that are required to view the article.
Draft
Whenever inserting or updating an article, the article will be taken into draft. Any changes you make will be saved in the draft automatically on a periodic basis (or if you click off the article). While it is in draft, others will not be able to see your changes. The article will also be locked so that others cannot edit the article until you are done with your changes. All other users will see a 'Change Is Pending' message at the bottom of the article when an article is either currently in draft mode or awaiting approval. Hovering over the message will give tooltip info of who the draft or change approval is currently assigned to. 
In order for others to see your changes, you must click Publish at the top of the article.
Draft articles will also be highlighted in red in the contents navigation to help you track where all your assigned articles are, whether it be draft articles or articles awaiting your approval.
If you wish to cancel any draft changes you've made to an article, click Cancel at the top of the article while in draft mode.
Note: Canceling a new article draft will delete the article entirely. A warning will appear to notify you.
Publishing
When you are done editing, click the Publish link at the top to actually make the changes visible to others. When publishing, you can provide an explanation of the changes, which will be made visible to any other reviewers and stored in the history. If approvers are required to review your change, it will tell you at the bottom of the publish window.
Tip: If you want to publish an article but not allow everyone to see it yet, consider adding a special user group to it - such as "Pre-release". You can then remove that group when it is suitable for wider release.
Delayed Publishing
When publishing you can optionally specify a date to publish the article (in the "More Options" area). If you do this, the approval process will occur straightaway. However, after the final approval occurs, the article will stay pending until the specified date. When that date comes about, the article will then publish automatically. You can also specify a time to publish, by appending the time after the date that is selected.
An administrator can click on the "History" link of the article to either change the date, to cancel the publish or publish it immediately.
Minor Changes You can also mark a change as being a "minor change". When you set this, it will not increase the version number of the article. It will also not notify any subscribers to the article.
Undo an Update
Should you want to roll-back to a previous version of an article or go back to an accidentally rejected change submission, you can find a record of these in History and Revert it. The same approval process will apply and a new change entry will be made in History for that submission.
More in-depth details for reverting to previous versions and change submissions can be found in History.
